# Online installation with kURL
This topic describes how to use Replicated kURL to provision a cluster in a virtual machine (VM) or bare metal server and install an application in the cluster.
Replicated kURL is an open source project. For more information, see the [kURL documentation](https://kurl.sh/docs/introduction/).
:::note
Replicated kURL is available only for existing customers. If you are not an existing kURL user, use Replicated Embedded Cluster instead. For more information, see [Use Embedded Cluster](/vendor/embedded-overview).
kURL is a Generally Available (GA) product for existing customers. For more information about the Replicated product lifecycle phases, see [Support Lifecycle Policy](/vendor/policies-support-lifecycle).
:::
## Prerequisites
Complete the following prerequisites:
* Ensure that your environment meets the minimum system requirements. See [kURL Installation Requirements](/enterprise/installing-kurl-requirements).
* Review the advanced installation options available for the kURL installer. See [Advanced Options](https://kurl.sh/docs/install-with-kurl/advanced-options) in the kURL documentation.
* Download your license file. Ensure that you can access the downloaded license file from the environment where you will install the application. See [Downloading Customer Licenses](/vendor/licenses-download).
- If you are installing in high availability (HA) mode, a load balancer is required. You can use the kURL internal load balancer if the [Embedded kURL Cluster Operator (EKCO) Add-On](https://kurl.sh/docs/add-ons/ekco) is included in the kURL Installer spec. Or, you can bring your own external load balancer. An external load balancer might be preferred when clients outside the cluster need access to the cluster's Kubernetes API.
To install in HA mode, complete the following prerequisites:
- (Optional) If you are going to use the internal EKCO load balancer, you can preconfigure it by passing `| sudo bash -s ha ekco-enable-internal-load-balancer` with the kURL install command. Otherwise, you are prompted for load balancer details during installation. For more information about the EKCO Add-on, see [EKCO Add-On](https://kurl.sh/docs/add-ons/ekco) in the open source kURL documentation.
- To use an external load balancer, ensure that the load balancer meets the following requirements:
- Must be a TCP forwarding load balancer
- Must be configured to distribute traffic to all healthy control plane nodes in its target list
- The health check must be a TCP check on port 6443
For more information about how to create a load balancer for kube-apirserver, see [Create load balancer for kube-apiserver](https://kubernetes.io/docs/setup/production-environment/tools/kubeadm/high-availability/#create-load-balancer-for-kube-apiserver) in the Kubernetes documentation.
You can optionally preconfigure the external loader by passing the `load-balancer-address=HOST:PORT` flag with the kURL install command. Otherwise, you are prompted to provide the load balancer address during installation.
## Install {#install-app}
To install an application with kURL:
1. Run one of the following commands to create the cluster with the kURL installer:
* For a regular installation, run:
```bash
curl -sSL https://k8s.kurl.sh/APP_NAME | sudo bash
```
* For high availability mode:
```bash
curl -sSL https://k8s.kurl.sh/APP_NAME | sudo bash -s ha
```
Replace:
* `APP_NAME` with the name of the application. The `APP_NAME` is included in the installation command that your vendor gave you. This is a unique identifier that KOTS will use to refer to the application that you install.
1.
1.
1. Go to the address provided in the `Kotsadm` field in the output of the installation command. For example, `Kotsadm: http://34.171.140.123:8800`.
1. On the Bypass Browser TLS warning page, review the information about how to bypass the browser TLS warning, and then click **Continue to Setup**.
1. On the HTTPS page, do one of the following:
- To use the self-signed TLS certificate only, enter the hostname (required) if you are using the identity service. If you are not using the identity service, the hostname is optional. Click **Skip & continue**.
- To use a custom certificate only, enter the hostname (required) if you are using the identity service. If you are not using the identity service, the hostname is optional. Then upload a private key and SSL certificate to secure communication between your browser and the Admin Console. Click **Upload & continue**.
1. Log in to the Admin Console with the password that was provided in the `Login with password (will not be shown again):` field in the output of the installation command.
1. Upload your license file.
1. On the **Preflight checks** page, the application-specific preflight checks run automatically. Preflight checks are conformance tests that run against the target namespace and cluster to ensure that the environment meets the minimum requirements to support the application. Click **Deploy**.
:::note
Replicated recommends that you address any warnings or failures, rather than dismissing them. Preflight checks help ensure that your environment meets the requirements for application deployment.
:::
1. (Minimal RBAC Only) If you are installing with minimal role-based access control (RBAC), KOTS recognizes if the preflight checks failed due to insufficient privileges. When this occurs, a kubectl CLI preflight command displays that lets you manually run the preflight checks. The Admin Console then automatically displays the results of the preflight checks. Click **Deploy**.

[View a larger version of this image](/images/kubectl-preflight-command.png)
The Admin Console dashboard opens.
On the Admin Console dashboard, the application status changes from Missing to Unavailable while the Deployment is being created. When the installation is complete, the status changes to Ready.
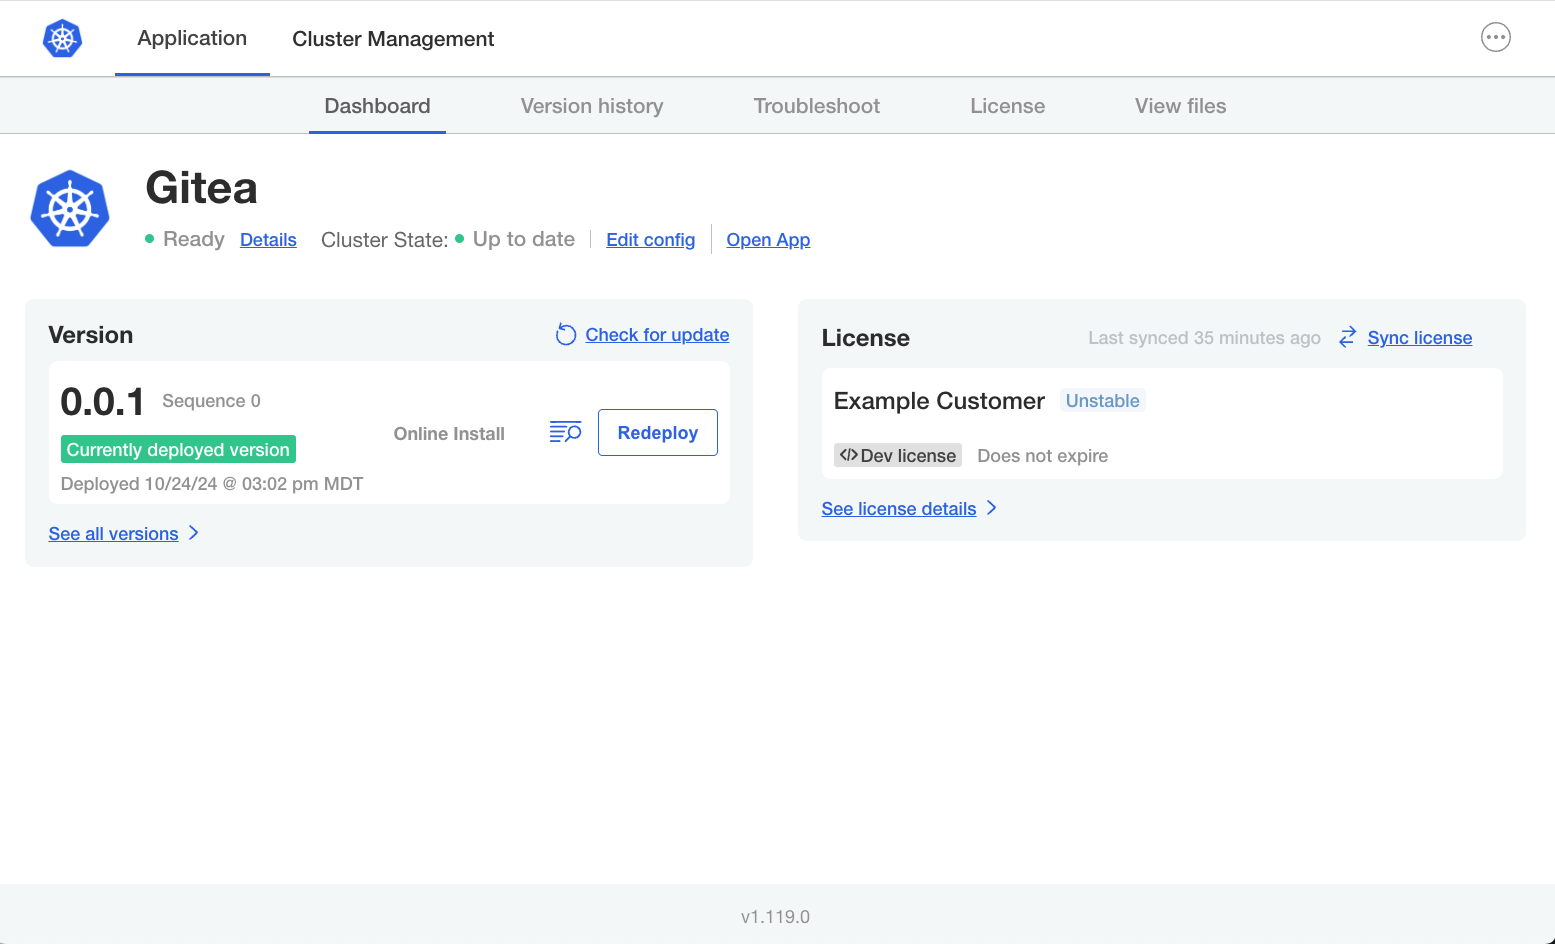
[View a larger version of this image](/images/gitea-ec-ready.png)
1. (Recommended) Change the Admin Console login password:
1. Click the menu in the top right corner of the Admin Console, then click **Change password**.
1. Enter a new password in the dialog, and click **Change Password** to save.
Replicated strongly recommends that you change the password from the default provided during installation in a kURL cluster. For more information, see [Change an Admin Console Password](auth-changing-passwords).
1. Add primary and secondary nodes to the cluster. You might add nodes to either meet application requirements or to support your usage of the application. See [Adding Nodes to Embedded Clusters](cluster-management-add-nodes).