# Manage customer license fields
This topic describes how to manage customer license fields in the Replicated Vendor Portal, including how to add custom fields and set initial values for the built-in fields.
## About license fields
License fields allow you to control customer entitlements and configure application behavior. The Replicated Vendor Portal includes built-in fields (such as license expiration and install options) and supports custom fields for application-specific requirements.
For information about how to access license field values in your application, see:
- For the Replicated SDK: [Get License Fields with the Replicated SDK API](licenses-reference-sdk)
- For Replicated installers (Embedded Cluster, KOTS, kURL): [Get License Fields in KOTS Applications](licenses-reference-kots-runtime)
- For Helm installations: [Get License Fields in Helm Installations](licenses-reference-helm)
- For verification: [Verify Signature and Get License Fields with the SDK API](licenses-verify-fields-sdk-api)
## Manage built-in license fields
This section describes how to manage the built-in license fields that are included in the licenses for all customer records by default. For a complete list of the built-in license fields, see [Built-In License Fields](/vendor/licenses-using-builtin-fields).
### Set initial values for built-in license fields {#initial-values}
You can set initial values for any of the built-in license fields, except the `name`, `email`, and `custom_id` fields.
Setting initial values pre-populates the built-in fields when your team creates a new customer from the Vendor Portal UI, reducing repetitive configuration and enforcing consistency across your customers. You can also prevent team members from changing the value of built-in license fields by locking the field. For information about how to lock license fields, see [Lock Built-In License Fields](#lock-built-in-license-fields) on this page.
:::note
Any initial values that you set for built-in license fields are _not_ applied to new customers created through the Vendor API v3. For more information, see [Create a customer](https://replicated-vendor-api.readme.io/reference/createcustomer-1) in the Vendor API v3 documentation.
:::
To set initial values for built-in license fields:
1. In the Vendor Portal, go to **License Fields**.
1. Under **Built-in license options**, open the menu for the license field where you want to set an initial value and click **Edit**.

[View a larger version of this image](/images/edit-initial-value.png)
1. In the **Edit built-in license field** dialog, edit the **Initial value** field.

[View a larger version of this image](/images/edit-built-in-license-field-dialog.png)
:::note
Click **Reset initial value** to reset the value for the field to its default.
:::
1. (Optional) Enable the **Locked** checkbox to lock the license field.
When a license field is locked, a lock icon is displayed on both the **Create a new customer** and **Manage customer** pages.
1. Click **Update** to save your changes.
### Lock built-in license fields
When a license field is locked, a lock icon is displayed on both the **Create a new customer** and **Manage customer** pages. To edit a locked field, click the lock icon to temporarily unlock it. Locking a license field makes it more difficult to accidentally change the field's value.
To lock a built-in license field:
1. Under **Built-in license options**, open the menu for the license field that you want to lock and click **Edit**.
1. In the **Edit built-in license field** dialog, enable the **Locked** checkbox to lock the license field.
1. Click **Update** to save your changes.
## Manage custom license fields
You can create custom license fields to add business- and application-specific data to customer licenses.
The custom license fields that you create are displayed in the Vendor Portal for all new and existing customers. If the custom field is not hidden, it is also displayed to customers under the **Licenses** tab in the Replicated Admin Console and in the **License Details** tab in the Enterprise Portal.
Custom license fields can also be created and managed through the Vendor API v3, which enables automation and integration with your existing systems. For more information, see [Create a custom license field](https://replicated-vendor-api.readme.io/reference/createcustomlicensefield) in the Vendor API v3 documentation.
### Limitation
The maximum size for a license field value is 64KB.
### Create custom license fields
To create a custom license field:
1. Log in to the Vendor Portal and select the application.
1. On the **License Fields** page, click **Create license field**.
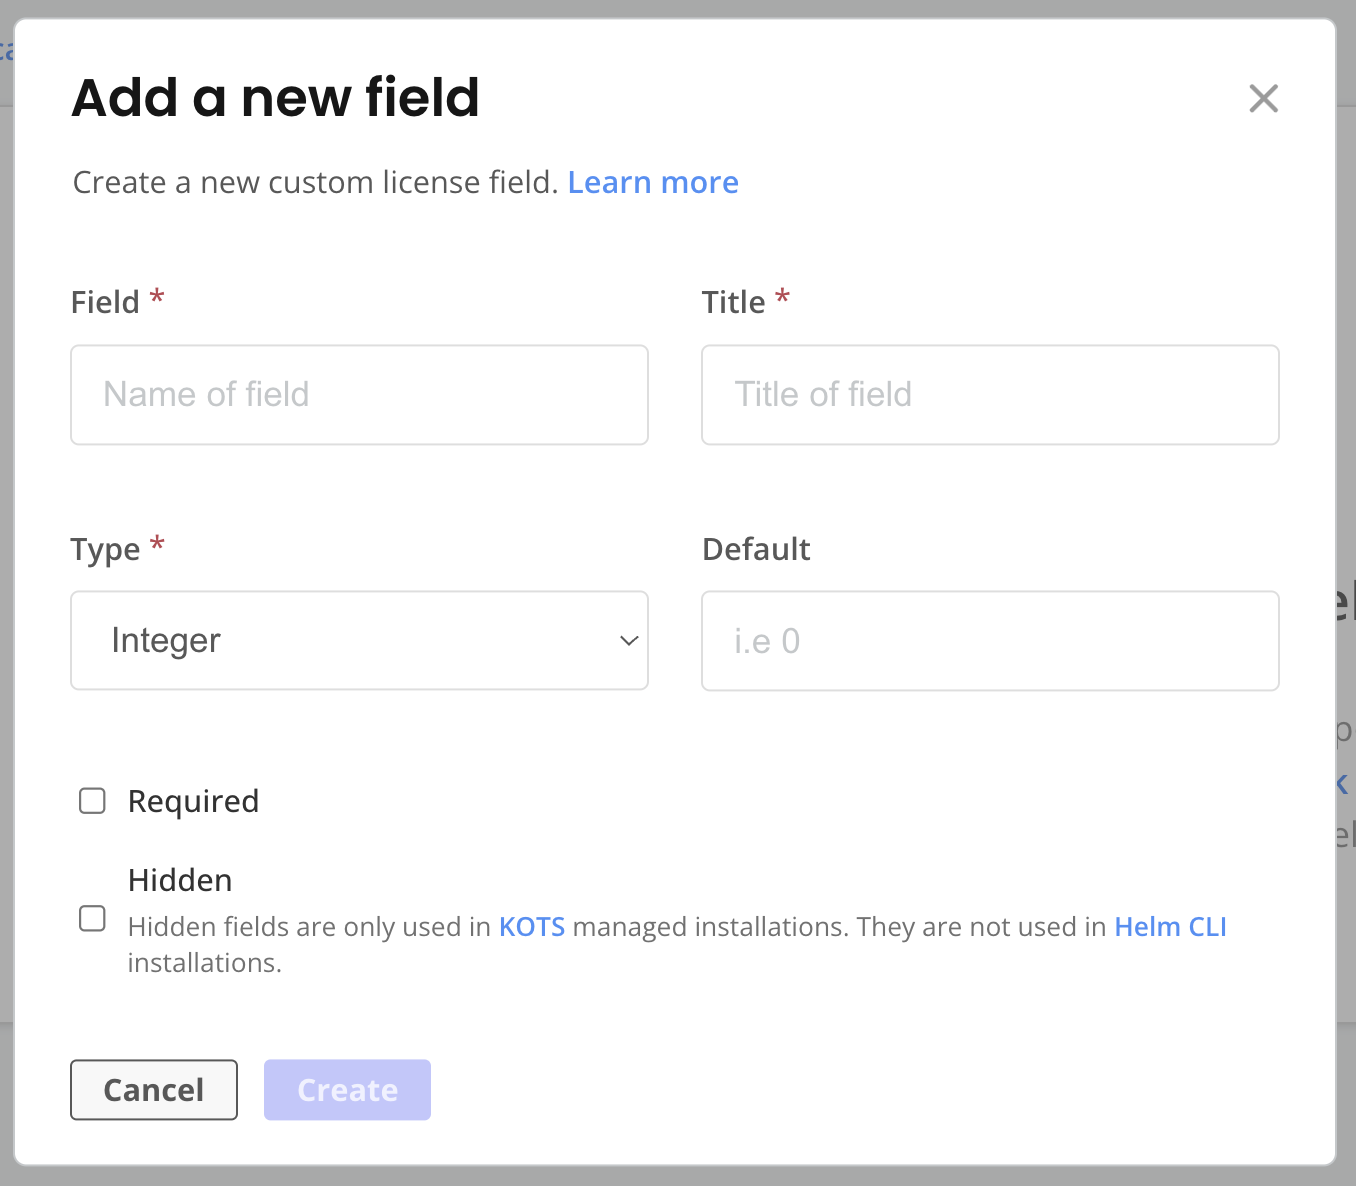 [View a larger version of this image](/images/license-add-custom-field.png)
1. Complete the following fields:
| Field | Description |
|-----------------------|------------------------|
| Field | The name used to reference the field. This value cannot be changed. |
| Title| The display name for the field. This is how the field appears in the Vendor Portal and the Admin Console. You can change the title in the Vendor Portal. |
| Type| The field type. This value cannot be changed. See [Custom License Field Types](#custom-license-field-types).
| Default | The default value for the field for both existing and new customers. It is a best practice to provide a default value when possible. When you create a new customer through the Vendor Portal UI or the Vendor API, defaults are applied only to fields that are not set. If you explicitly set a field, the default is not applied. The maximum size for a license field value is 64KB. |
| Required | If checked, this prevents the creation of customers unless this field is explicitly defined with a value. |
| Hidden | If checked, the field is not visible to your customer in the Replicated Admin Console or in their Enterprise Portal. The field is still visible to you in the Vendor Portal. **Note**: The Hidden field is displayed only for vendors with access to the Replicated installers (KOTS, kURL, Embedded Cluster). |
### Update custom license fields
To update a custom license field:
1. Log in to the Vendor Portal and select the application.
1. On the **License Fields** page, click **Edit Field** on the right side of the target row. Changing the default value for a field updates the value for each existing customer record that has not overridden the default value.
:::important
Enabling **Is this field is required?** updates the license field to be required on all new and existing customers. If you enable **Is this field is required?**, you must either set a default value for the field or manually update each existing customer to provide a value for the field.
:::
### Delete custom license fields
Deleted license fields and their values do not appear in the customer's license in any location, including your view in the Vendor Portal, the downloaded YAML version of the license, and the Admin Console **License** screen.
By default, deleting a custom license field also deletes all of the values associated with the field in each customer record.
Only administrators can delete license fields.
:::important
Replicated recommends that you take care when deleting license fields.
Outages can occur for existing deployments if your application or the Admin Console **Config** page expect a license file to provide a required value.
:::
To delete a custom license field:
1. Log in to the Vendor Portal and select the application.
1. On the **License Fields** page, click **Edit Field** on the right side of the target row.
1. Click **Delete** on the bottom left of the dialog.
1. (Optional) Enable **Preserve License Values** to save values for the license field that were not set by the default in each customer record. Preserved license values are not visible to you or the customer.
:::note
If you enable **Preserve License Values**, you can create a new field with the same name and `type` as the deleted field to reinstate the preserved values.
:::
1. Follow the instructions in the dialog and click **Delete**.
### Custom license field types
Each custom license field has a _type_ that is used to validate its value. The type also determines the widget that you use to set the license field's value on the **Manager customer** page.
| Type | Description | Use cases | Widget |
|------|-------------|-----------|--------|
| Integer | A whole number numeric value | Use for numeric capacity limits, quotas, or counts. For example, `seats: 100` or `max_nodes: 5`. | Text field |
| String | Single-line text values | Use for short form text that fits on a single line, like short identifiers or environment names. For example, `account_manager: jeff_noble`. | Text field |
| Text | Longer form text that can contain multiple lines | Use for multi-line content like JSON configurations, certificates, or long descriptions. | Text area |
| Boolean | True or false value | Use for on/off features or capabilities like feature flags and support options. For example, `premium_support: true`, `analytics_enabled: false`. | Checkbox |
| Password | A short string of text that is masked on display in the UI. Note: Values are cleartext in the license file. | Use for sensitive values that should be masked in the UI like API keys, tokens, or credentials. | Password field |
| Enum | Provides a list of possible values | Use when there is a set of predefined options for the field. For example, a `tier` field might have options like basic, premium, and enterprise. | Dropdown |
:::note
String, Text, Password, and Enum types are all represented as strings in the license.
:::
### How custom fields appear in licenses
Custom license fields appear in the customer's license YAML under `spec.entitlements`. Your application can read these values to enforce limits or configure behavior.
The following example shows a license with custom fields:
```yaml
apiVersion: kots.io/v1beta1
kind: License
spec:
licenseID: "customer-123"
customerName: "Acme Corp"
entitlements:
expires_at:
title: Expiration
value: "2026-12-31T00:00:00Z"
valueType: String
seats:
title: Maximum Users
value: 100
valueType: Integer
tier:
title: Support Tier
value: "enterprise"
valueType: String
premium_support:
title: Premium Support Enabled
value: true
valueType: Boolean
```
## Set customer-specific values for custom license fields
To set a customer-specific value for a custom license field:
1. Log in to the Vendor Portal and select the application.
1. Click **Customers**.
1. For the target customer, click the **Manage customer** button.
1. Under **Custom fields**, enter values for the target custom license fields for the customer.
:::note
The maximum size for a license field value is 64KB.
:::
[View a larger version of this image](/images/license-add-custom-field.png)
1. Complete the following fields:
| Field | Description |
|-----------------------|------------------------|
| Field | The name used to reference the field. This value cannot be changed. |
| Title| The display name for the field. This is how the field appears in the Vendor Portal and the Admin Console. You can change the title in the Vendor Portal. |
| Type| The field type. This value cannot be changed. See [Custom License Field Types](#custom-license-field-types).
| Default | The default value for the field for both existing and new customers. It is a best practice to provide a default value when possible. When you create a new customer through the Vendor Portal UI or the Vendor API, defaults are applied only to fields that are not set. If you explicitly set a field, the default is not applied. The maximum size for a license field value is 64KB. |
| Required | If checked, this prevents the creation of customers unless this field is explicitly defined with a value. |
| Hidden | If checked, the field is not visible to your customer in the Replicated Admin Console or in their Enterprise Portal. The field is still visible to you in the Vendor Portal. **Note**: The Hidden field is displayed only for vendors with access to the Replicated installers (KOTS, kURL, Embedded Cluster). |
### Update custom license fields
To update a custom license field:
1. Log in to the Vendor Portal and select the application.
1. On the **License Fields** page, click **Edit Field** on the right side of the target row. Changing the default value for a field updates the value for each existing customer record that has not overridden the default value.
:::important
Enabling **Is this field is required?** updates the license field to be required on all new and existing customers. If you enable **Is this field is required?**, you must either set a default value for the field or manually update each existing customer to provide a value for the field.
:::
### Delete custom license fields
Deleted license fields and their values do not appear in the customer's license in any location, including your view in the Vendor Portal, the downloaded YAML version of the license, and the Admin Console **License** screen.
By default, deleting a custom license field also deletes all of the values associated with the field in each customer record.
Only administrators can delete license fields.
:::important
Replicated recommends that you take care when deleting license fields.
Outages can occur for existing deployments if your application or the Admin Console **Config** page expect a license file to provide a required value.
:::
To delete a custom license field:
1. Log in to the Vendor Portal and select the application.
1. On the **License Fields** page, click **Edit Field** on the right side of the target row.
1. Click **Delete** on the bottom left of the dialog.
1. (Optional) Enable **Preserve License Values** to save values for the license field that were not set by the default in each customer record. Preserved license values are not visible to you or the customer.
:::note
If you enable **Preserve License Values**, you can create a new field with the same name and `type` as the deleted field to reinstate the preserved values.
:::
1. Follow the instructions in the dialog and click **Delete**.
### Custom license field types
Each custom license field has a _type_ that is used to validate its value. The type also determines the widget that you use to set the license field's value on the **Manager customer** page.
| Type | Description | Use cases | Widget |
|------|-------------|-----------|--------|
| Integer | A whole number numeric value | Use for numeric capacity limits, quotas, or counts. For example, `seats: 100` or `max_nodes: 5`. | Text field |
| String | Single-line text values | Use for short form text that fits on a single line, like short identifiers or environment names. For example, `account_manager: jeff_noble`. | Text field |
| Text | Longer form text that can contain multiple lines | Use for multi-line content like JSON configurations, certificates, or long descriptions. | Text area |
| Boolean | True or false value | Use for on/off features or capabilities like feature flags and support options. For example, `premium_support: true`, `analytics_enabled: false`. | Checkbox |
| Password | A short string of text that is masked on display in the UI. Note: Values are cleartext in the license file. | Use for sensitive values that should be masked in the UI like API keys, tokens, or credentials. | Password field |
| Enum | Provides a list of possible values | Use when there is a set of predefined options for the field. For example, a `tier` field might have options like basic, premium, and enterprise. | Dropdown |
:::note
String, Text, Password, and Enum types are all represented as strings in the license.
:::
### How custom fields appear in licenses
Custom license fields appear in the customer's license YAML under `spec.entitlements`. Your application can read these values to enforce limits or configure behavior.
The following example shows a license with custom fields:
```yaml
apiVersion: kots.io/v1beta1
kind: License
spec:
licenseID: "customer-123"
customerName: "Acme Corp"
entitlements:
expires_at:
title: Expiration
value: "2026-12-31T00:00:00Z"
valueType: String
seats:
title: Maximum Users
value: 100
valueType: Integer
tier:
title: Support Tier
value: "enterprise"
valueType: String
premium_support:
title: Premium Support Enabled
value: true
valueType: Boolean
```
## Set customer-specific values for custom license fields
To set a customer-specific value for a custom license field:
1. Log in to the Vendor Portal and select the application.
1. Click **Customers**.
1. For the target customer, click the **Manage customer** button.
1. Under **Custom fields**, enter values for the target custom license fields for the customer.
:::note
The maximum size for a license field value is 64KB.
:::
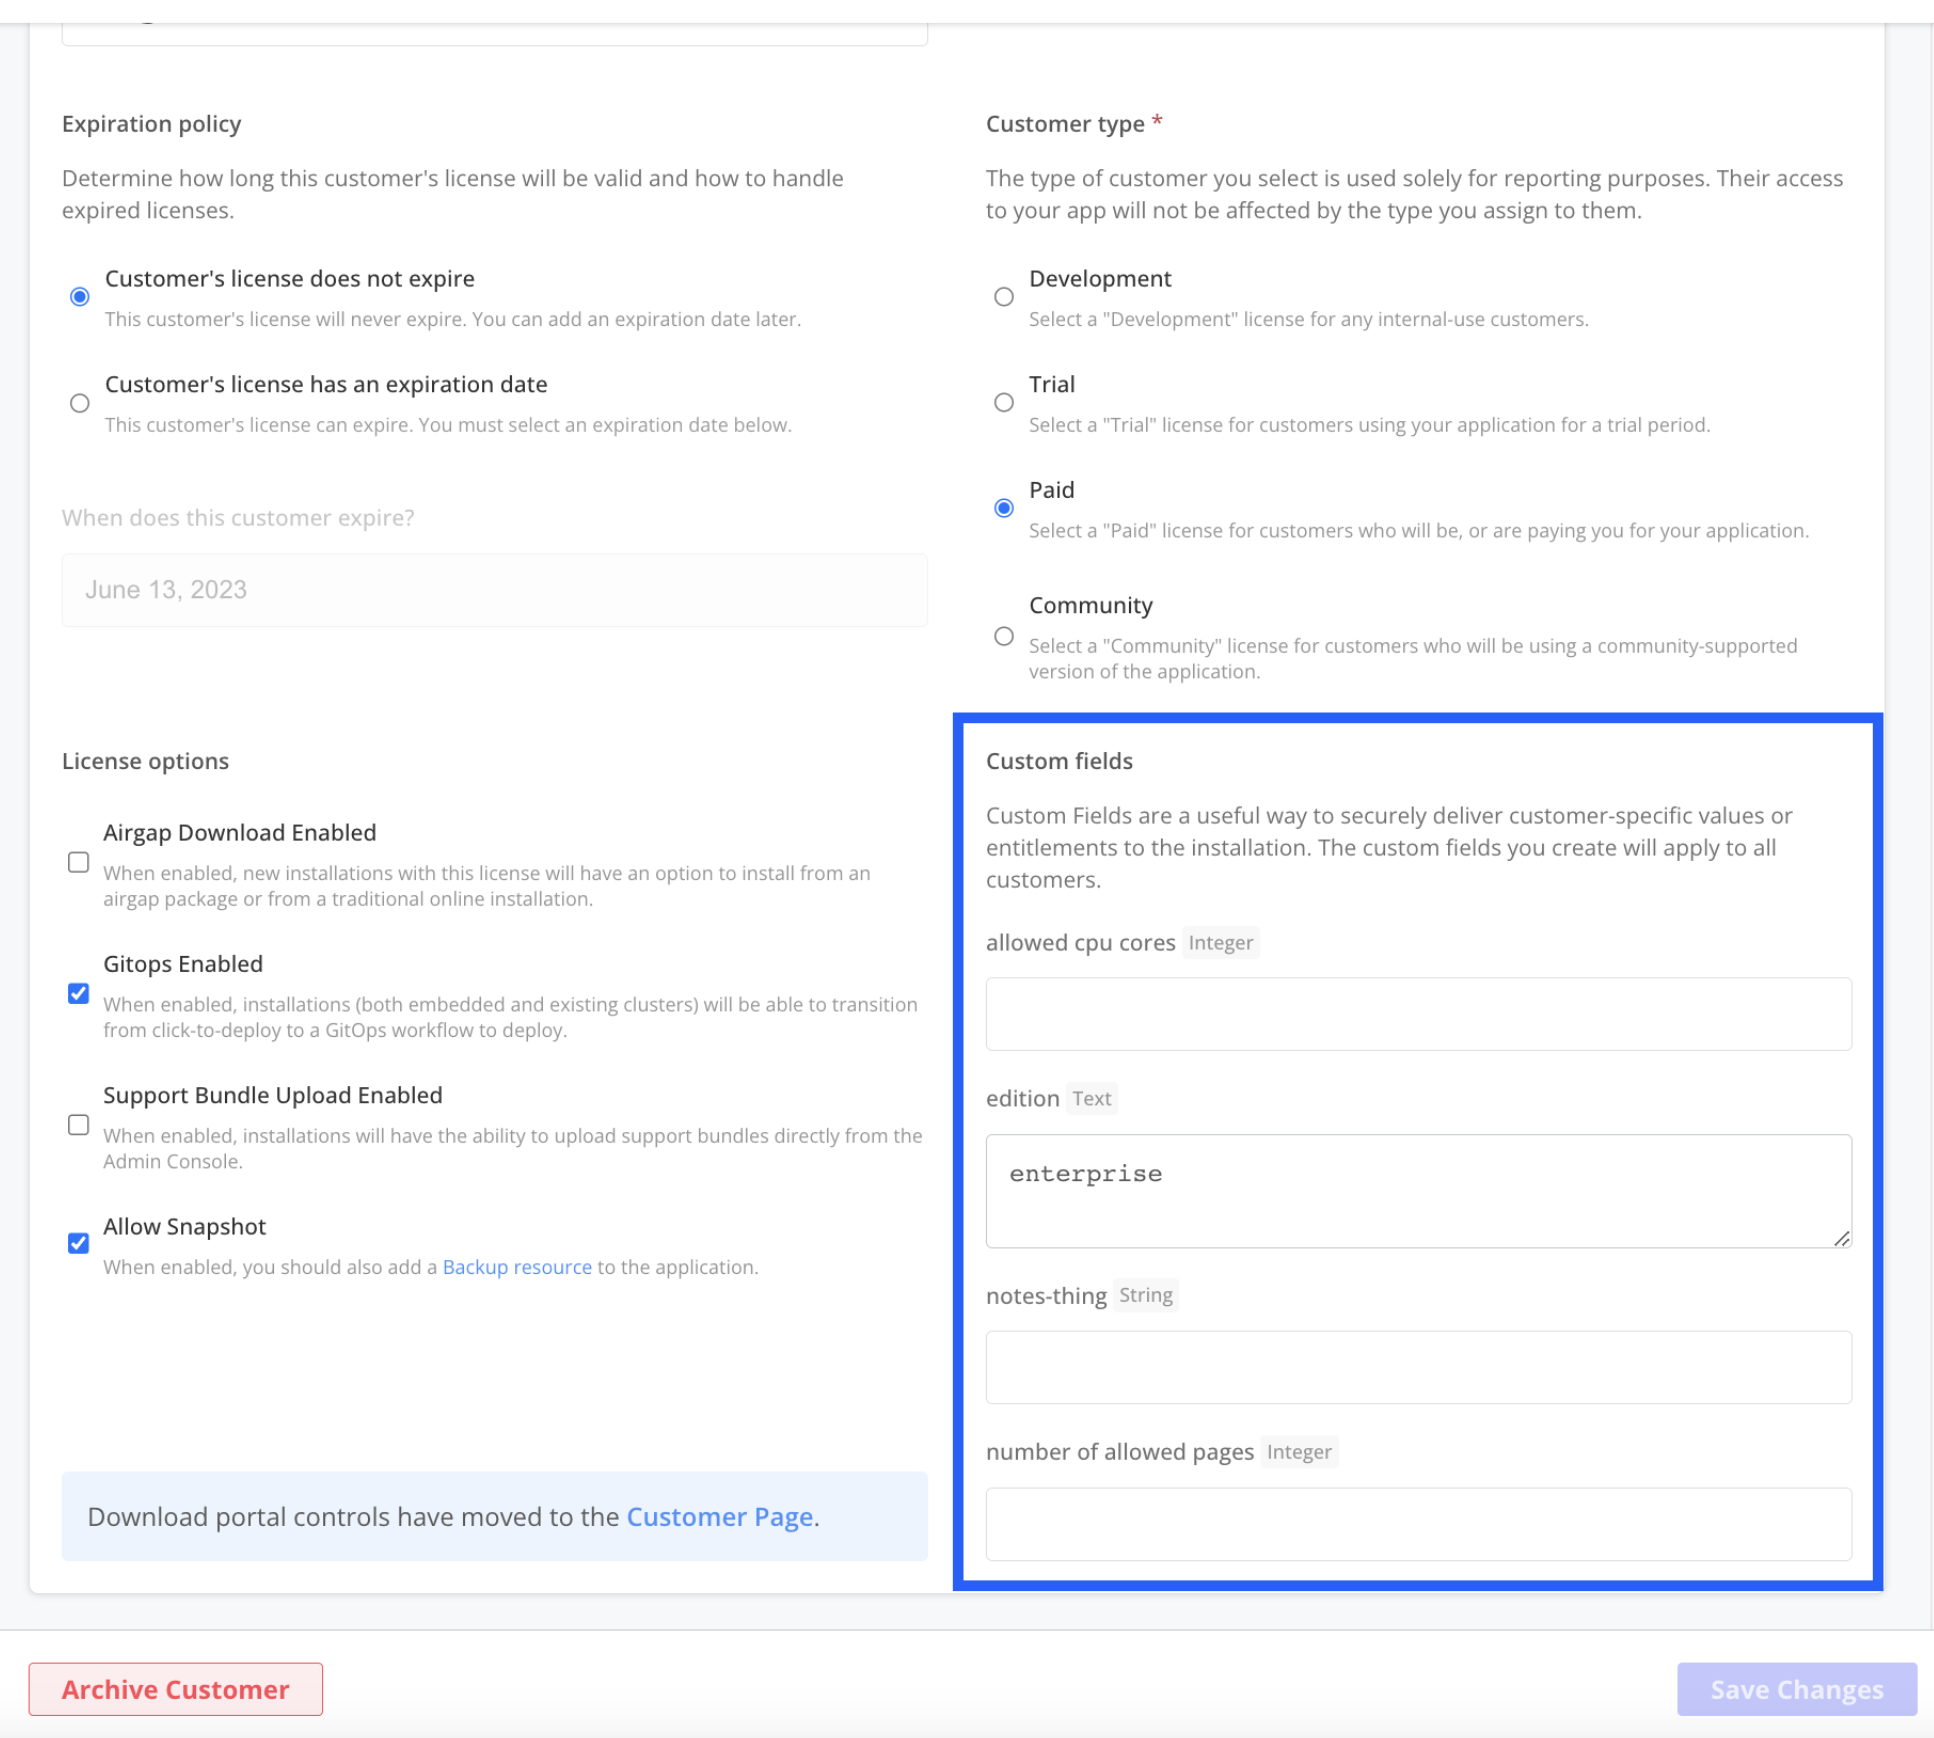 [View a larger version of this image](/images/customer-license-custom-fields.png)