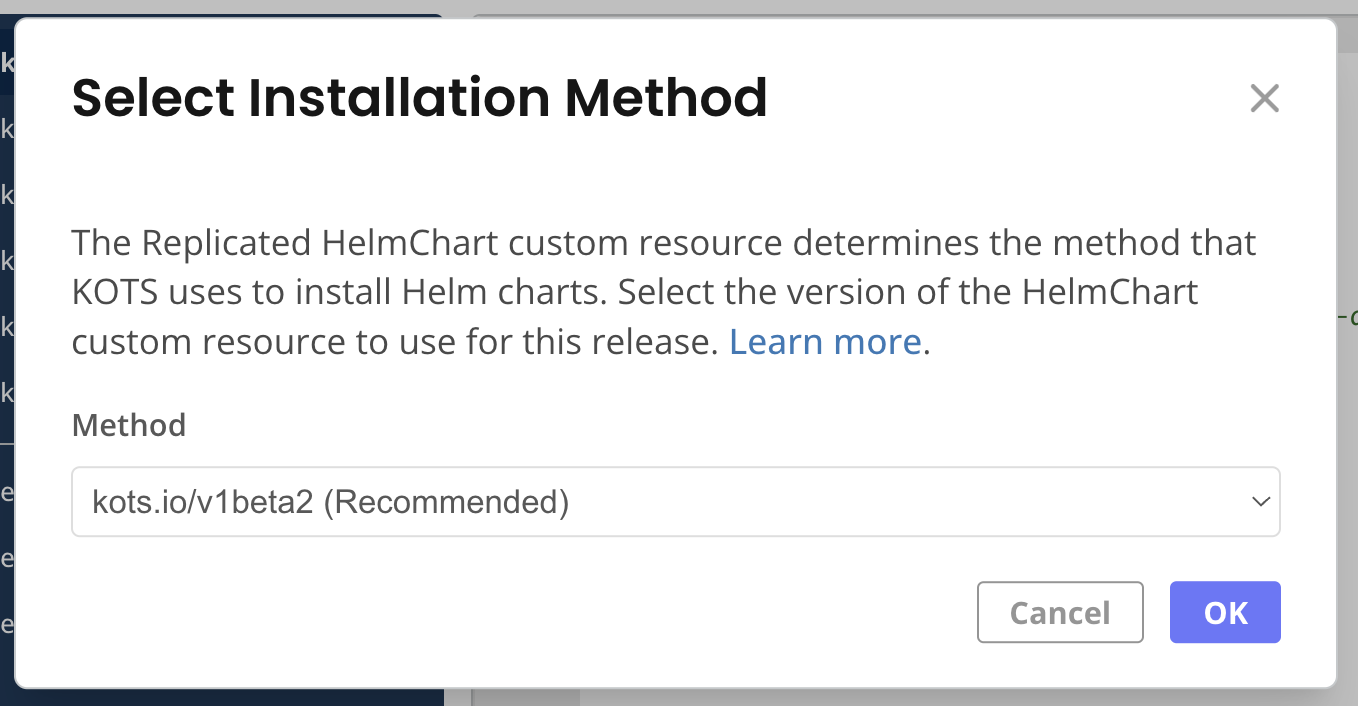
 [View a larger version of this image](/images/helm-select-install-method.png)
1. Click **Save release**. This saves a draft that you can continue to edit until you promote it.
1. Click **Promote**. In the **Promote Release** dialog, edit the fields:
For more information about the requirements and limitations of each field, see Release Properties in _About Channels and Releases_.
[View a larger version of this image](/images/helm-select-install-method.png)
1. Click **Save release**. This saves a draft that you can continue to edit until you promote it.
1. Click **Promote**. In the **Promote Release** dialog, edit the fields:
For more information about the requirements and limitations of each field, see Release Properties in _About Channels and Releases_.
| Field | Description |
|---|---|
| Channel |
Select the channel where you want to promote the release. If you are not sure which channel to use, use the default Unstable channel. |
| Version label |
Enter a version label. If you have one or more Helm charts in your release, the Vendor Portal automatically populates this field. You can change the version label to any |
| Requirements | Select the Prevent this release from being skipped during upgrades to mark the release as required for KOTS installations. This option does not apply to installations with Helm. |
| Release notes | Add release notes. The release notes support markdown and are shown to your customer. |
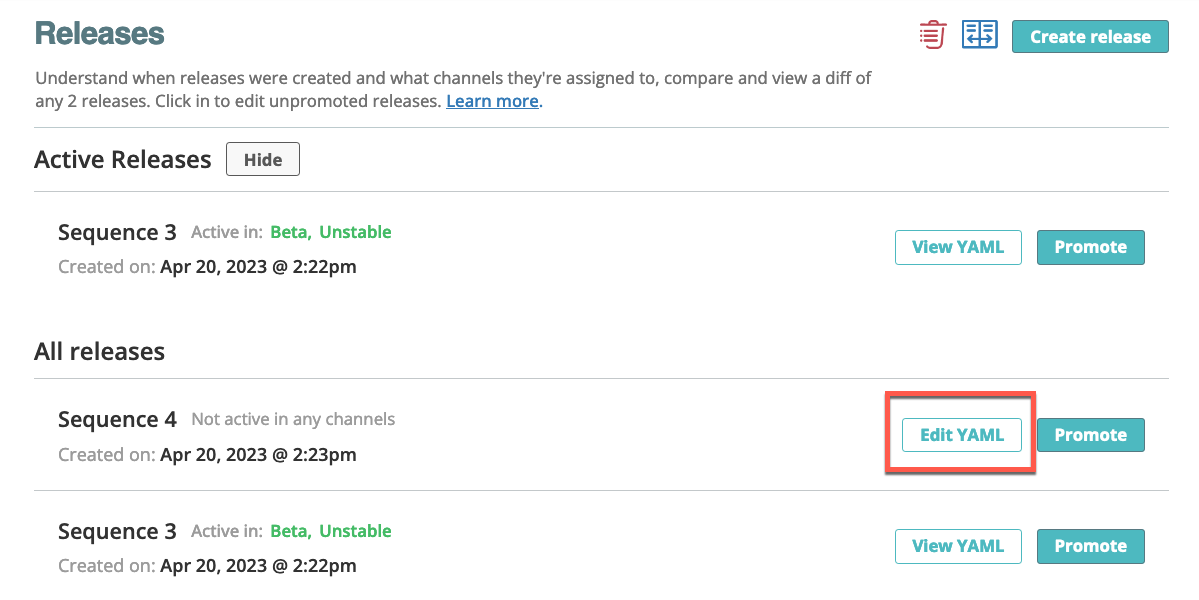 [View a larger image](/images/releases-edit-draft.png)
1. Click **Save** to save your updated draft.
1. (Optional) Click **Promote**.
## Edit release properties
You can edit the properties of a release at any time. For more information about release properties, see [Release Properties](releases-about#release-properties) and [Required Releases](releases-about#required-releases) in _About Channels and Releases_.
To edit release properties:
1. Go to **Channels**.
1. In the channel where the release was promoted, click **Release History**.
1. For the release sequence that you want to edit, open the dot menu and click **Edit release**.
1. Edit the properties as needed.
[View a larger image](/images/releases-edit-draft.png)
1. Click **Save** to save your updated draft.
1. (Optional) Click **Promote**.
## Edit release properties
You can edit the properties of a release at any time. For more information about release properties, see [Release Properties](releases-about#release-properties) and [Required Releases](releases-about#required-releases) in _About Channels and Releases_.
To edit release properties:
1. Go to **Channels**.
1. In the channel where the release was promoted, click **Release History**.
1. For the release sequence that you want to edit, open the dot menu and click **Edit release**.
1. Edit the properties as needed.
 [View a larger image](/images/release-properties.png)
:::note
For information about disabling the **Prevent this release from being skipped during upgrades** option for a release that was previously marked as required, see [Remove Release Requirement](#remove-req) below.
:::
1. Click **Update Release**.
## Remove release requirement {#remove-req}
You can disable the **Prevent this release from being skipped during upgrades** property for a release to remove the "required" label from the release in the Enterprise Portal.
Additionally, for online (internet-connected) installations using KOTS 1.126.0 or later (Embedded Cluster 2.10.0 or later), the requirement is removed from the Admin Console the next time that an upstream update check occurs.
For more information about working with required releases, see [Required Releases](releases-about#required-releases) in _About Channels and Releases_.
To remove the requirement from a release:
1. Go to **Channels**.
1. In the channel where the release was promoted, click **Release History**.
1. For the release sequence that you want to edit, open the dot menu and click **Edit release**.
1. Disable the **Prevent this release from being skipped during upgrades** option.
1. Click **Update Release**.
:::note
To skip a previously-required release during upgrades, users must first update their installation to KOTS 1.126.0 or later (Embedded Cluster 2.10.0 or later).
:::
## Archive a release
You can archive releases to remove them from view on the **Releases** page. Archiving a release that has been promoted does _not_ remove the release from the channel's **Release History** page or prevent KOTS from downloading the archived release.
To archive one or more releases:
1. From the **Releases** page, click the trash can icon in the upper right corner.
1. Select one or more releases.
1. Click **Archive Releases**.
1. Confirm the archive action when prompted.
## Demote a release
A channel release can be demoted from a channel. When a channel release is demoted, the release is no longer available for download, but is not withdrawn from environments where it was already downloaded or installed. For more information, see [Demotion](/vendor/releases-about#demotion) in _About Channels and Releases_.
For information about demoting and un-demoting releases with the Replicated CLI, see [channel demote](/reference/replicated-cli-channel-demote) and [channel un-demote](/reference/replicated-cli-channel-un-demote).
To demote a release in the Vendor Portal:
1. Go to **Channels**.
1. In the channel where the release was promoted, click **Release History**.
1. For the release sequence that you want to demote, open the dot menu and select **Demote Release**.
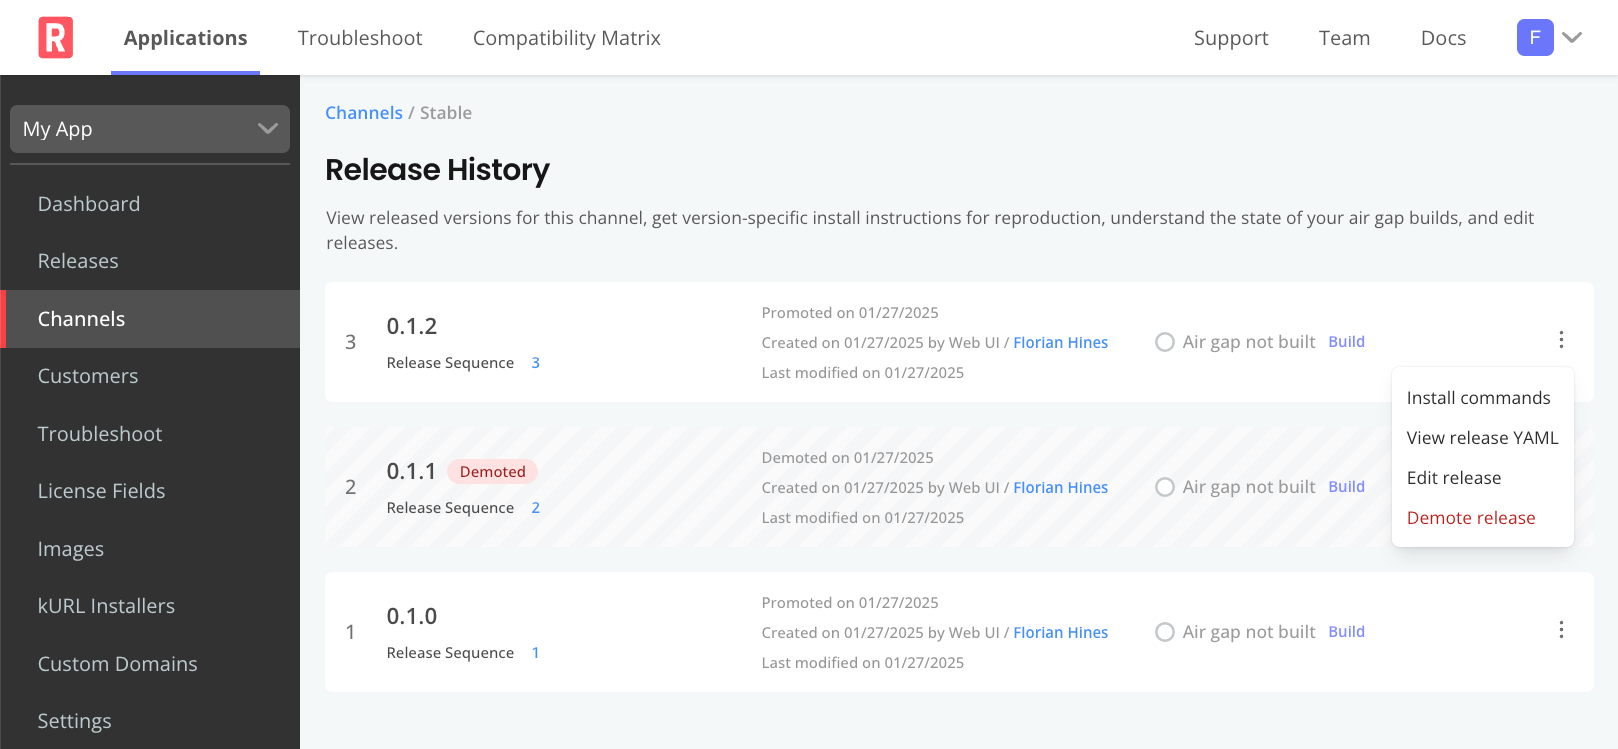
[View a larger version of this image](/images/channels-release-history.png)
After the release is demoted, the given release sequence is greyed out and a **Demoted** label is displayed next to the release on the **Release History** page.
[View a larger image](/images/release-properties.png)
:::note
For information about disabling the **Prevent this release from being skipped during upgrades** option for a release that was previously marked as required, see [Remove Release Requirement](#remove-req) below.
:::
1. Click **Update Release**.
## Remove release requirement {#remove-req}
You can disable the **Prevent this release from being skipped during upgrades** property for a release to remove the "required" label from the release in the Enterprise Portal.
Additionally, for online (internet-connected) installations using KOTS 1.126.0 or later (Embedded Cluster 2.10.0 or later), the requirement is removed from the Admin Console the next time that an upstream update check occurs.
For more information about working with required releases, see [Required Releases](releases-about#required-releases) in _About Channels and Releases_.
To remove the requirement from a release:
1. Go to **Channels**.
1. In the channel where the release was promoted, click **Release History**.
1. For the release sequence that you want to edit, open the dot menu and click **Edit release**.
1. Disable the **Prevent this release from being skipped during upgrades** option.
1. Click **Update Release**.
:::note
To skip a previously-required release during upgrades, users must first update their installation to KOTS 1.126.0 or later (Embedded Cluster 2.10.0 or later).
:::
## Archive a release
You can archive releases to remove them from view on the **Releases** page. Archiving a release that has been promoted does _not_ remove the release from the channel's **Release History** page or prevent KOTS from downloading the archived release.
To archive one or more releases:
1. From the **Releases** page, click the trash can icon in the upper right corner.
1. Select one or more releases.
1. Click **Archive Releases**.
1. Confirm the archive action when prompted.
## Demote a release
A channel release can be demoted from a channel. When a channel release is demoted, the release is no longer available for download, but is not withdrawn from environments where it was already downloaded or installed. For more information, see [Demotion](/vendor/releases-about#demotion) in _About Channels and Releases_.
For information about demoting and un-demoting releases with the Replicated CLI, see [channel demote](/reference/replicated-cli-channel-demote) and [channel un-demote](/reference/replicated-cli-channel-un-demote).
To demote a release in the Vendor Portal:
1. Go to **Channels**.
1. In the channel where the release was promoted, click **Release History**.
1. For the release sequence that you want to demote, open the dot menu and select **Demote Release**.

[View a larger version of this image](/images/channels-release-history.png)
After the release is demoted, the given release sequence is greyed out and a **Demoted** label is displayed next to the release on the **Release History** page.